
National Seed Swap Day (January 31, 2026) and Valentine’s Day (February 14) are just around the corner. Looking for a last-minute gift idea that won’t break your budget and will be cherished by gardening friends? Consider creating native plant seed kits!
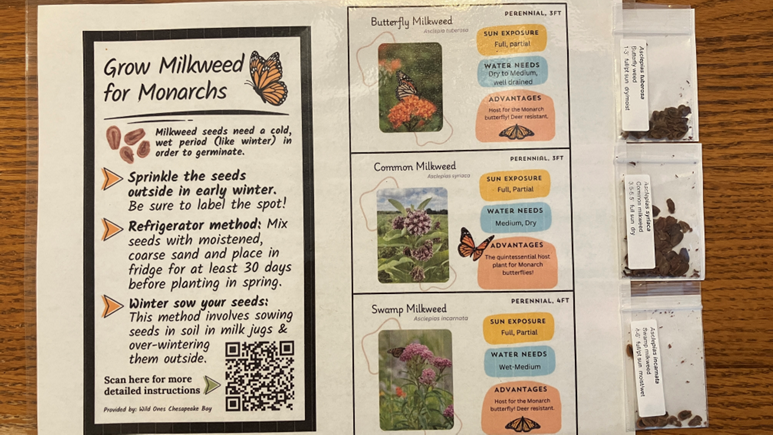
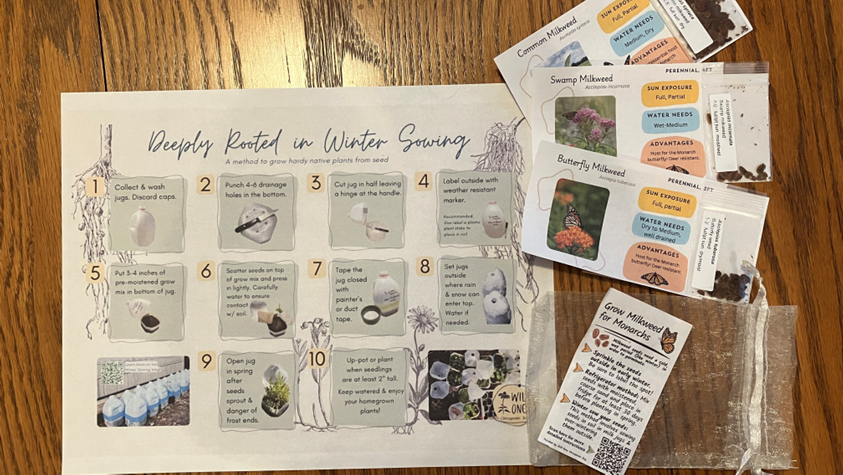
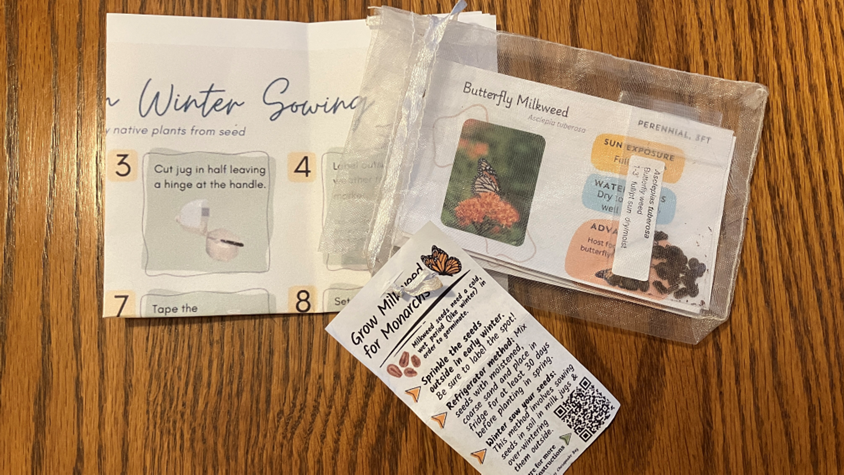
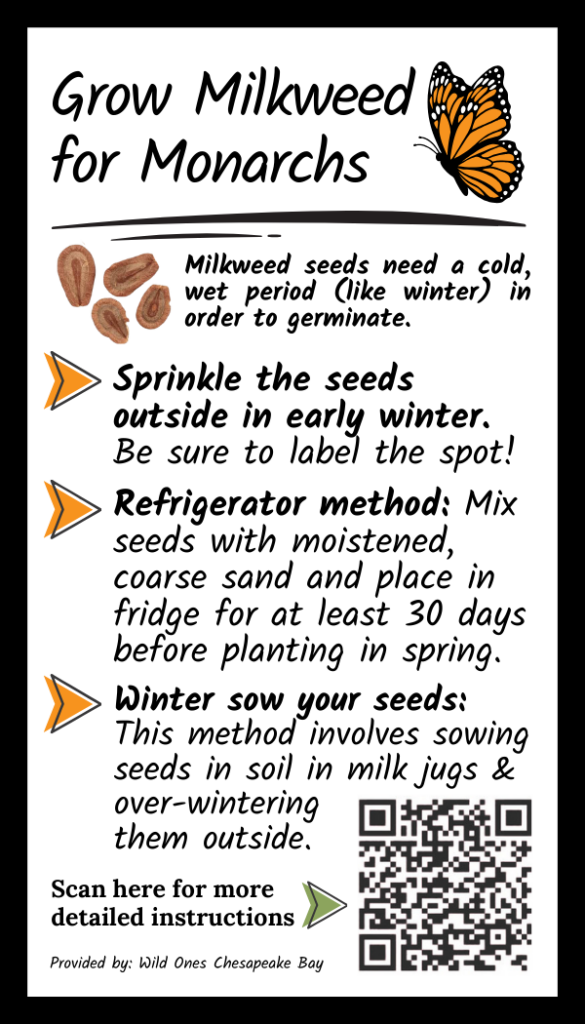
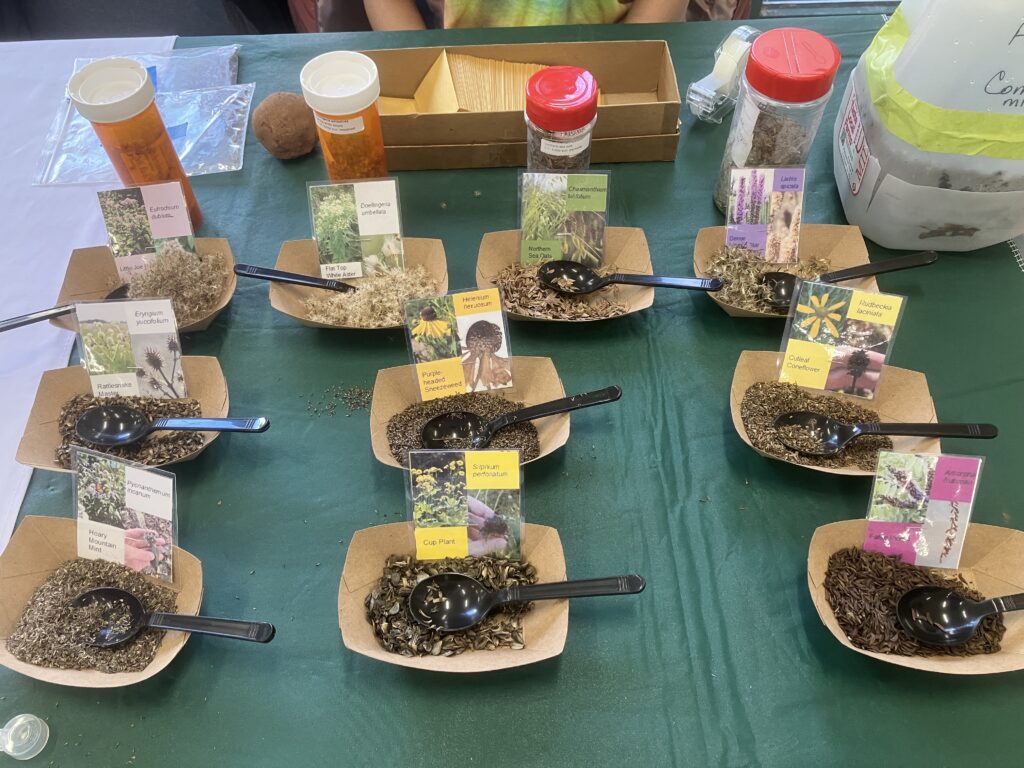
First, package individual species of native seeds. Prepare instructions for growing, such as our “Grow Milkweed for Monarchs” or our “Deeply Rooting in Winter Sowing” graphic. Place the seeds and instructions into an organza bag that can be used for future seed collecting.
Organize a Seed Swap
Perhaps you have an overabundance of native seeds and want to hold a seed swap for National Seed Swap Day. Here are some suggestions on how to organize one from Seed Savers Exchange.
“Seed swaps are nothing new! Humanity has been organizing seed swaps for 10,000 years, coming together at markets, town squares, in huts and in halls to swap seeds and stories. But seed swaps are being rediscovered by a new generation of plant people, and their collective joy, excitement, and knowledge is really at the core of the community seed movement. While seed swaps are not a new concept, National Seed Swap Day was started and registered by Kathy Jentz, editor and publisher of Washington Gardener Magazine, and the first official event was held on January 26, 2006.” ~ Seed Savers Exchange
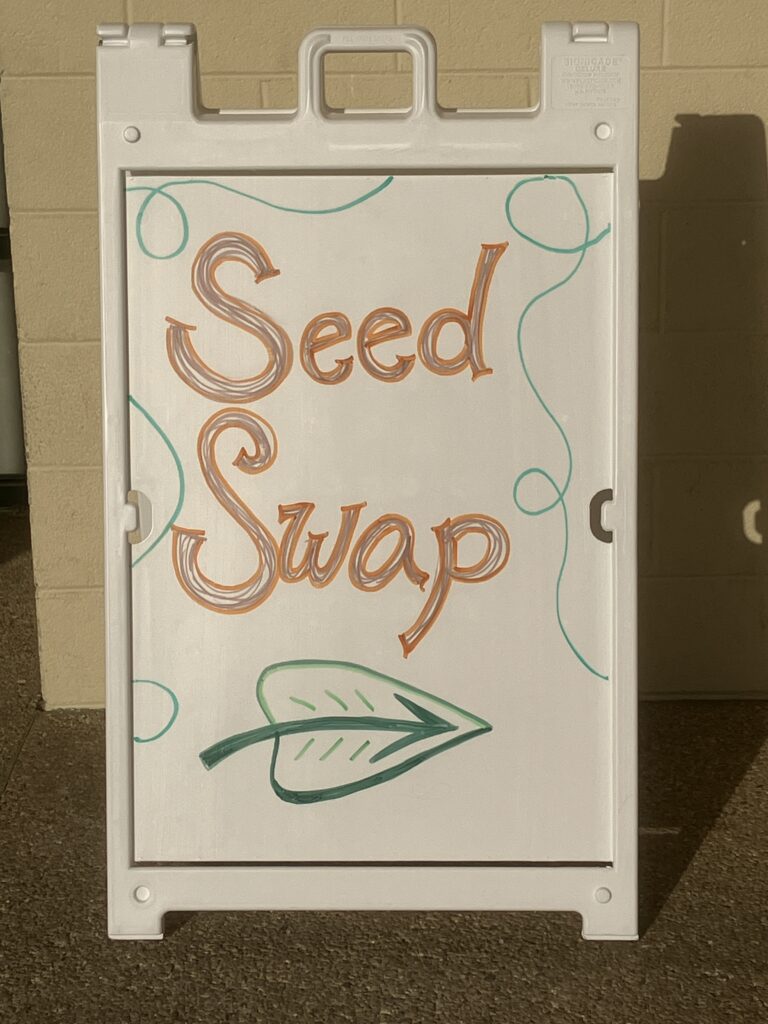


Check out the Seed Savers Exchange for more information on how to plan, organize, promote, and set up your seed swap. And join us, along with dozens of other organizations, at the Mt. Rainier Nature Center on January 31 for their annual seed swap festival. Visit our event page for more information.
Host a Winter Sowing Social
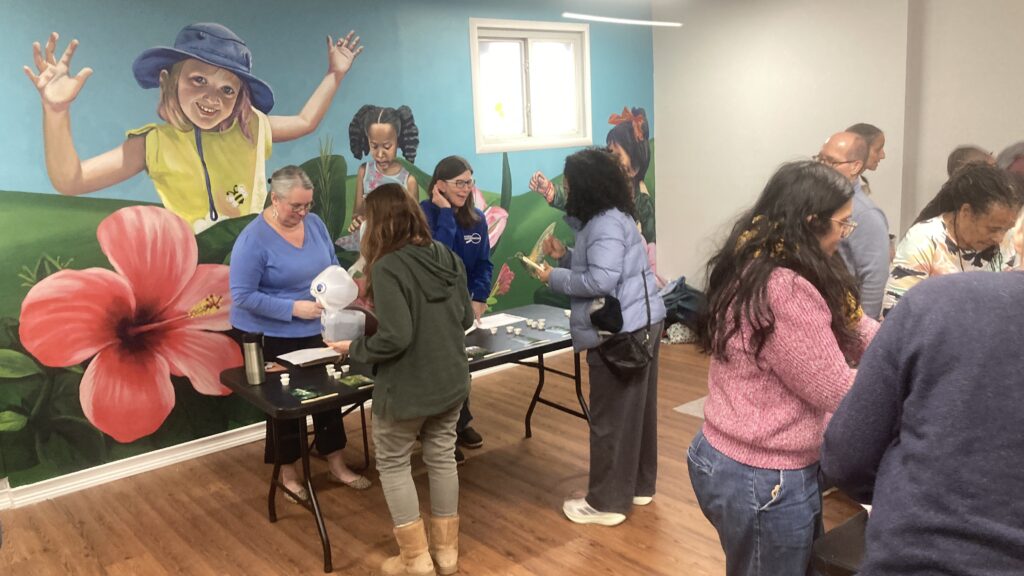
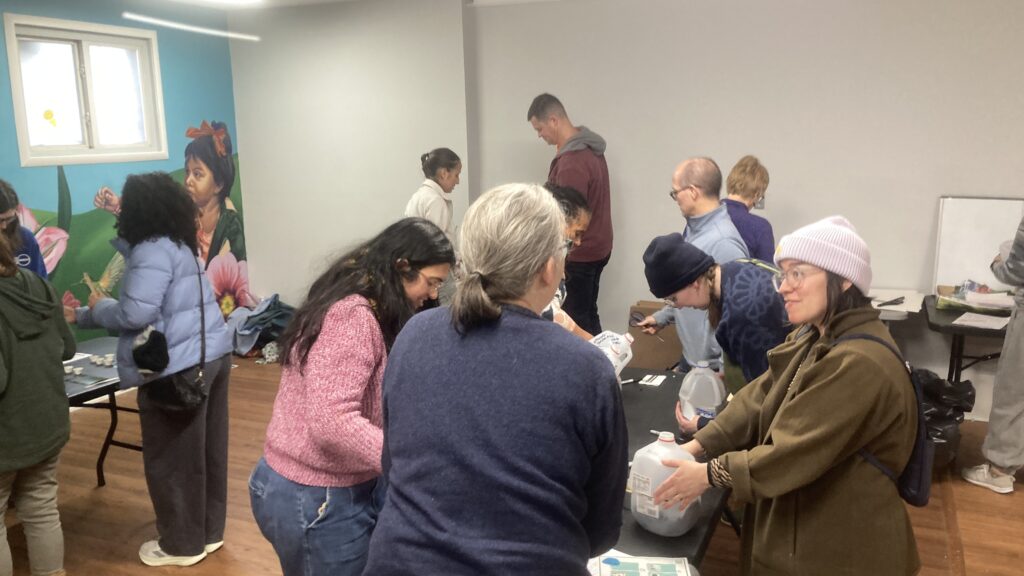
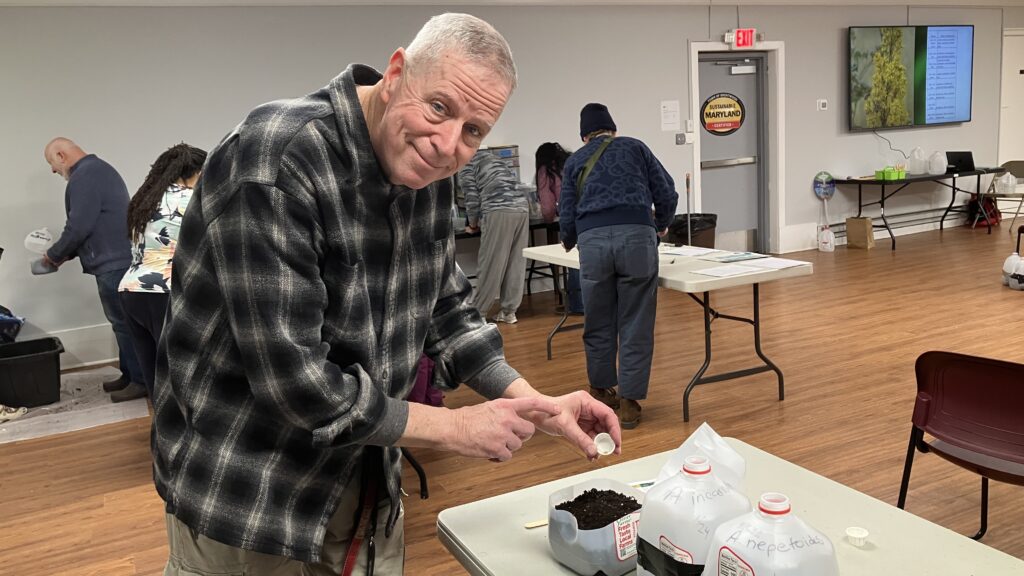
Another idea for sharing seeds is to host a winter sowing social. Hosting a winter sowing social is a fantastic, low-cost way to get a head start on spring gardening with friends. The goal is to set up protective, vented containers (usually milk jugs) outside to allow seeds to germinate naturally through freeze-thaw cycles.
Here is a step-by-step guide to hosting a successful, productive winter sowing social.
1. Planning and Preparation
- When to Host: January through March is ideal. For perennials that need cold stratification, start early. For hardy annuals or vegetables, you can wait closer to spring.
- Invite Guests: Ask guests to bring their own clean, clear plastic containers (milk jugs, gallon water jugs, salad clamshells).
- Set the Scene: Set up in a garage, basement, or around a large table with trash bags for easy cleanup.
- Gather Supplies:
- Potting Mix or Seed starting mix
- Seeds: Native perennials, annuals, grasses, sedges, vines, shrubs, or trees
- Tools: Sharp scissors or box cutters, waterproof markers (paint pens or laundry markers are better than Sharpies), and heavy-duty, clear duct tape.
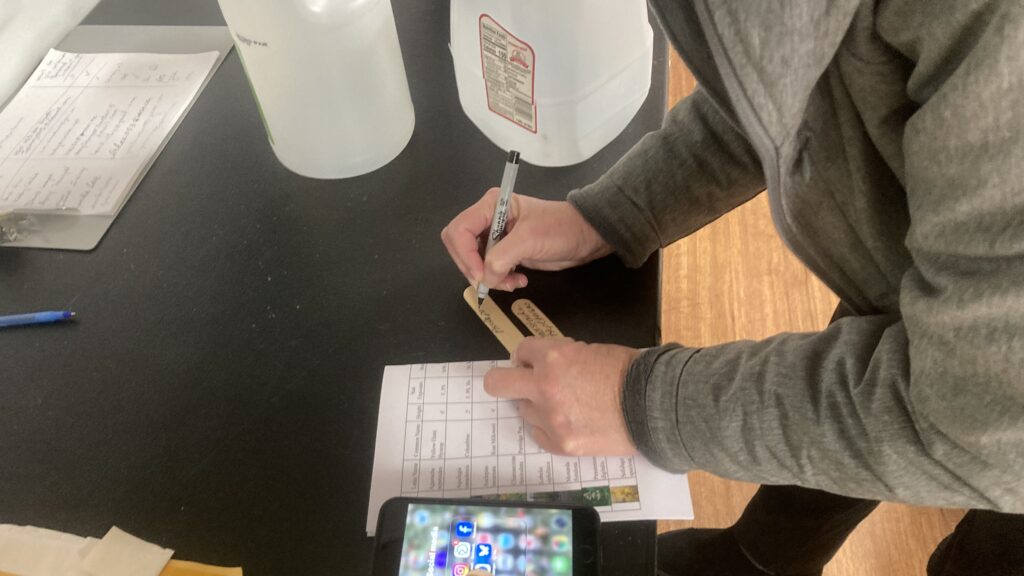
- Labels: Popsicle sticks or plant tags.
2. Activity Setup (Step-by-Step Instructions for Guests)
- Prep Containers: Cut the milk jug in half, leaving about 3-4 inches from the bottom. Leave a small “hinge” of plastic near the handle to hold the top on.
- Drainage Holes: Poke 4–6 drainage holes in the bottom of the container with a knife, scissors, or drill.
- Fill with Soil: Add 3-4 inches of moist potting or seed starting mix.
- Sow Seeds: Sprinkle seeds on top of the soil and cover larger seeds with a thin layer of soil or sand (no deeper than the size of the seed). Do not cover tiny seeds.
- Label: Label the container with the plant name and date. Also label a plant stick or popsicle stick with the plant name and place inside container.
- Water: Ensure the seeds and soil are damp by giving it a quick spray with water.
- Seal: Tape the container shut using duct tape. Do not seal the top of the jug with the cap; the cap should be removed to allow rain/snow inside.
3. Socializing and Tips
- Seed Swap: Encourage guests to bring extra seeds to share or swap.
- Educational Aspect: Discuss which plants work best (native plants, cold-hardy perennials) and explain how the vented, protective nature of the container protects the seeds and later, avoids the need for hardening off.
- Address Common Mistakes: Remind guests to use waterproof markers, not to place containers directly against a house (which can cause overheating), and to make sure the containers are in a spot where they will get rain/snow.
4. Post-Party Care
- Placement: Place the containers outside where they are exposed to the winter elements. Do not place under decks or awnings.
- Maintenance: Generally, you can ignore them, but check periodically to ensure the soil is moist (not dried out) and that they are not knocked over.
- Spring Management: When seedlings appear and weather warms, move containers to shade or part shade or start venting or removing the tops to prevent seedlings from baking in the sun and heat.
For added fun, provide hot cocoa or snacks, making it a cozy, productive winter afternoon!
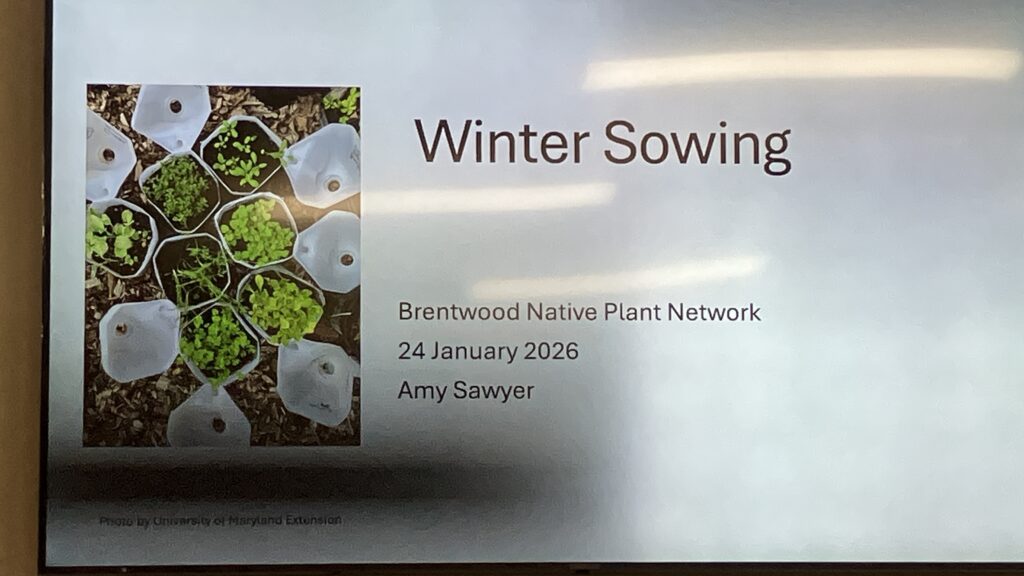

Host a Virtual Winter Sowing Workshop
To host a virtual winter sowing workshop, follow these steps:
- Choose a platform: Select a reliable virtual meeting platform like Zoom or Google Meet.
- Plan the agenda: Outline the workshop’s content, including the winter sowing process, benefits, and supplies needed.
- Choose a presentation: Choose from one of several available on our Deeply Rooted in Winter Sowing blog or search the web.
- Provide the supplies list needed for attendees to winter sow at home:
- 1 clean gallon-size, clear milk jug
- About 4 cups of potting mix
- Native seeds of choice: Perennials, annuals, grasses, sedges, vines, shrubs, or trees. Participants can be encouraged in advance to check out their local native seed libraries or plant swaps if they don’t have their own.
- Tools: Sharp scissors or box cutters, waterproof markers (paint pens or laundry markers are better than Sharpies), and heavy-duty, clear duct tape.
- Labels: Popsicle sticks or plant tags.
- Create a welcoming environment: Use engaging visuals and interactive elements to engage participants.
- Record the session: Ensure the workshop is recorded for future reference and accessibility.
- Follow up: Send a followup email to participants with a link to the recorded session along with any additional resources.
By following these steps, you can create an engaging and informative virtual workshop that helps participants learn about winter sowing and the benefits of growing native plants.
Resources
Learn more about winter sowing, other germination methods, and Maryland native plants at these links:
Deeply Rooted in Winter Sowing
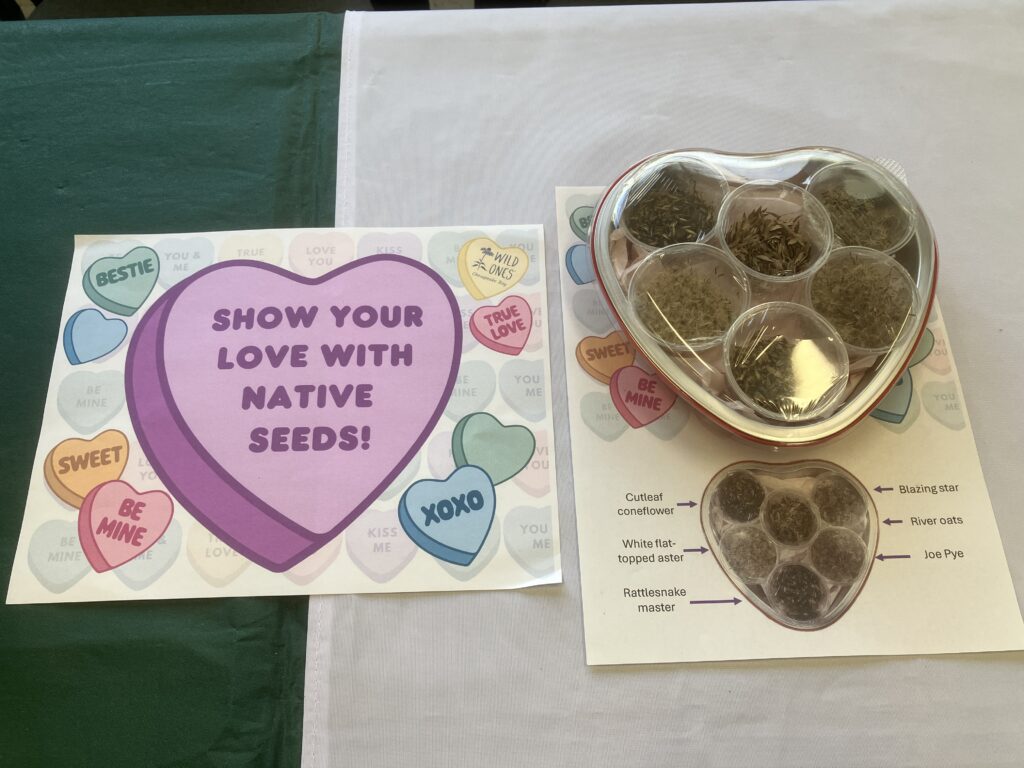
Show Your Love with Native Seeds
Maryland Native Plants Program
Wild Ones Chesapeake Bay is deeply rooted in native plants and cultivating partnerships, while striving to educate, advocate, and collaborate to connect people and native plants for a healthy planet. Our vision is native plants and natural landscapes thriving in every community. Check out our Events page, Google calendar, Facebook, and/or Instagram for our upcoming events. And don’t forget to subscribe to our new YouTube channel and email subscriber list!
